
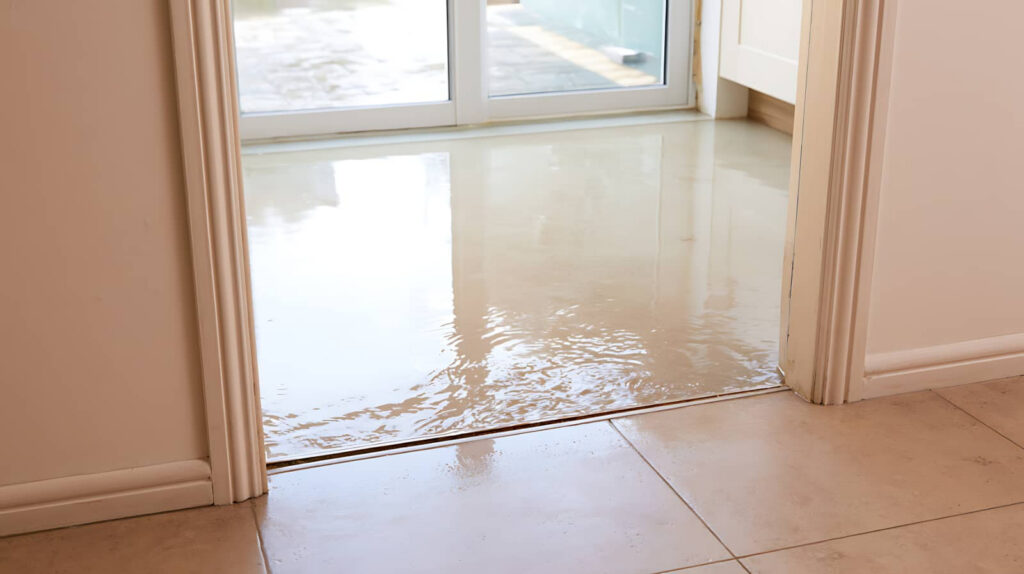
When the floodwaters recede like a clock resetting after a storm, you’re left with a home that needs fast, careful action. You should shut off power, inspect damage, and remove standing water before moisture spreads behind walls and floors. Then you’ll need to clean, dry, and sanitize affected areas to reduce mold risk, while repair teams restore structure and materials—because the next step can determine how much you save.
Key Takeaways
- Prioritize safety by shutting off power if safe, wearing protective gear, and avoiding areas with structural shifts or contamination.
- Document all storm damage with clear photos and notes for insurance and restoration records.
- Remove standing water quickly, then dry affected rooms with pumps, wet vacs, air movers, and dehumidifiers.
- Inspect walls, ceilings, floors, attics, and crawlspaces for hidden moisture, warped materials, and mold risk.
- Repair or replace saturated drywall, insulation, flooring, and damaged systems with professional restoration support.
What To Do Right After Flood Damage
Right after flood damage, you should focus on safety first and then begin documenting the affected areas. Turn off electricity if you can do so safely, and avoid standing water until a qualified technician confirms conditions are secure.
Wear protective gear, move valuables to a dry space, and take clear photos of each damaged room, item, and surface. Record dates, times, and odors, then note where water entered.
Keep your family together and communicate with your insurer or restoration team early. This helps you stay organized and supported during the storm flooding restoration process.
If you notice structural shifts, contaminated water, or hidden moisture, wait for professionals. Your quick, calm actions protect your home and help your crew restore it efficiently.
Inspect Storm Flood Damage
Begin a thorough inspection by checking every area touched by water, wind, or debris so you can identify both visible and hidden storm damage.
Walk the property methodically, noting stains, warped materials, broken seals, loose shingles, and damaged siding.
Check ceilings, walls, floors, windows, doors, and foundation lines for cracks, swelling, or soft spots.
In attics, crawlspaces, and closets, look for damp insulation, musty odors, and discoloration.
Photograph each issue from multiple angles and record the location, size, and severity.
If you spot sagging structures, exposed wiring, or gas smells, stay out and call trained help right away.
Your careful review helps you stay organized, protect your space, and move forward with confidence alongside others facing the same recovery steps.
How Storm Flood Restoration Works
You’ll start with a water damage assessment to identify affected materials, moisture levels, and hidden issues after the storm.
Next, technicians extract standing water and use controlled drying to reduce further damage and limit mold growth.
Once the structure’s stable, they repair and restore damaged areas so you can return to a safe, functional property.
Water Damage Assessment
After a storm, professionals start with a thorough water damage assessment to determine how far moisture has spread and which materials need immediate attention.
You’ll see them inspect walls, floors, ceilings, and hidden cavities so they can map the damage accurately. They use calibrated meters, thermal imaging, and visual checks to separate surface dampness from deeper intrusion. This careful process helps you avoid guesswork and supports a safer recovery.
- Identify affected areas and moisture sources.
- Document damage for clear, organized reporting.
- Prioritize spaces that need immediate stabilization.
You’re not alone in this step; your restoration team works with you, explains findings, and builds a plan based on evidence.
That means you get practical guidance, fewer surprises, and a clearer path forward after the storm.
Extraction And Drying
Once the damaged areas are mapped, technicians move in quickly to remove standing water and slow further deterioration.
You’ll usually see truck-mounted pumps, weighted extractors, and wet vacs working together to pull water from floors, carpet, and hidden pockets.
After extraction, you get targeted drying with air movers and dehumidifiers positioned to create steady airflow and lower humidity.
Moisture meters help the team track progress so they can adjust equipment before mold risk grows.
If insulation, subflooring, or wall cavities stay damp, they’ll use focused drying methods to reach those spaces.
You’re not left guessing; the process is monitored, documented, and calibrated to restore safe dryness as efficiently as possible while protecting your property and giving you a clear path forward.
Repair And Restoration
With the structure fully dried, technicians shift into repair and restoration, where they replace damaged materials and rebuild affected areas to pre-loss condition.
You’ll see crews remove warped drywall, compromised insulation, and ruined flooring, then inspect framing, subfloors, and electrical systems for hidden damage. They match materials, seal joints, and restore finishes so your space feels whole again.
- Replace structural and cosmetic components.
- Repair plumbing, wiring, and HVAC impacts.
- Repaint, reinstall trim, and verify safety.
Throughout the process, you stay informed, and your team works to bring your property back with care and precision.
This stage restores function, appearance, and confidence after the storm, helping you feel like you belong in your home again.
Remove Water And Dry Your Home
Start by removing standing water as quickly as possible to limit further damage and reduce the risk of mold growth. Use pumps, wet vacuums, or professional extraction equipment to clear floors, carpets, and hidden cavities.
Then open windows if weather allows, and run fans and dehumidifiers to push out moisture from walls, subfloors, and furnishings. You’ll want steady airflow across every affected area, so move furniture and lift rugs to expose damp surfaces.
Check baseboards, closets, and corners for trapped humidity, since water often lingers there after the visible puddles are gone. Keep monitoring moisture levels until readings return to normal.
With a careful drying plan, you can protect your home’s structure, support a faster recovery, and feel confident that your space is moving back toward safe, livable comfort.
Clean And Sanitize To Prevent Mold
After the affected areas are dry, you should clean all surfaces with a detergent solution to remove dirt, debris, and contaminants left behind by floodwater.
Then sanitize high-touch areas so germs don’t linger and mold has fewer places to start. Wear gloves, eye protection, and a mask, and keep windows open if you can. Use fans to maintain airflow while you work.
- Scrub hard surfaces with warm water and detergent.
- Apply a sanitizer approved for flood cleanup and follow the label.
- Dry each area completely before moving on.
Pay close attention to baseboards, counters, and fixtures, where moisture can hide.
If you’re restoring your space with care, you’re protecting your home and everyone who belongs in it.
Repair Flood And Debris Damage
You’ll first remove flood debris to clear access and reduce further damage.
Next, you’ll assess structural damage so you can identify compromised framing, flooring, and support materials.
Then you’ll repair or replace water-soaked materials to restore the area safely and properly.
Remove Flood Debris
Before repairs can begin, professionals clear out flood debris to make the property safe and fully accessible. You’ll see crews sort, bag, and haul away ruined drywall, soaked insulation, mud, branches, and damaged belongings with care. This step keeps your space organized and helps you feel like recovery’s underway.
They remove loose debris and set aside salvageable items.
They use protective gear and containment methods to limit dust and contamination.
They load waste for approved disposal, then verify pathways are clear.
You’re not handling this alone; the team works with you to restore order fast. By removing debris early, they create a cleaner, safer environment for the next phase of flood restoration and give your property a solid starting point.
Assess Structural Damage
With debris cleared, professionals can inspect the full extent of storm and flood damage to your property’s structure.
They’ll check framing, foundation, load-bearing walls, roof lines, and openings for shifting, cracking, bowing, or impact damage. You’ll get a clear assessment of what’s stable, what needs immediate shoring, and what can wait for planned repairs.
Licensed inspectors may use moisture meters, level tools, and visual documentation to confirm hidden stress points and code concerns.
This step helps you and your restoration team prioritize safety, reduce further failure, and build a repair plan that fits your home’s condition.
You’re not facing this alone; a careful structural evaluation gives your property the best path back to strength, function, and peace of mind.
Repair Water-Soaked Materials
Once the structure is stable, restoration crews start removing or repairing water-soaked materials so moisture doesn’t keep spreading through the property. You’ll see them sort drywall, insulation, flooring, and trim for cleanup or replacement, depending on how far the water reached and how long it sat. This step protects your home and helps you feel supported through a tough process.
Cut out saturated drywall and insulation.
Remove warped wood, carpet, and padding.
Clean, disinfect, and dry salvageable surfaces.
Crews also document debris damage, check hidden cavities, and confirm every repaired area meets drying targets before rebuilding starts.
When you work with trained professionals, you’re not facing the mess alone—they’ll help you restore safe, solid materials and move closer to normal again.
Restore Your Property Safely
After the floodwater recedes, you should restore your property in a controlled, step-by-step way to reduce hazards and prevent further damage.
First, shut off power and gas until a qualified professional confirms it’s safe. Wear boots, gloves, and a respirator when you enter damp areas.
Ventilate rooms, remove standing water, and keep dehumidifiers running to lower moisture.
Check walls, floors, insulation, and fixtures for hidden damage, then document everything for your claim.
Disinfect hard surfaces and discard materials that can’t be thoroughly dried or cleaned.
Work with trusted restoration specialists so you’re not handling every risk alone. They’ll help you test for mold, structural weakness, and electrical issues, giving you a safer path back home.
Frequently Asked Questions
How Long Does Storm Flood Restoration Usually Take?
Storm flood restoration usually takes a few days to several weeks, depending on damage, drying time, and repairs. You’ll get faster results when you act quickly, document losses, and work with qualified professionals.
Does Insurance Cover All Storm Flooding Restoration Costs?
No, you usually won’t get every storm flooding restoration cost covered. You’ll see water-soaked walls, mud lines, and damaged flooring; your policy may cover sudden loss, but deductibles, limits, and exclusions often reduce payment.
Can I Stay in My Home During Restoration?
You can sometimes stay if damage’s limited, utilities work, and your rooms stay dry, but you’ll need to leave when mold, electrical hazards, or demolition start. Your restoration team’ll help you decide safely.
What Equipment Do Professionals Use for Water Extraction?
You’ll see professionals use truck-mounted extractors, portable wet vacuums, submersible pumps, and weighted wand extractors. They’ll also deploy moisture meters and air movers, so you’re protected, informed, and part of the recovery process.
How Much Does Storm Flood Restoration Typically Cost?
You’ll typically pay $1,000 to $7,000, though severe damage can cost more. You’ll reduce surprises by getting inspections, photo documentation, and a detailed estimate from certified restorers who’ll explain every step clearly.
Conclusion
As you wrap up storm flooding restoration, remember that acting fast protects your home and health. Turn off power, inspect damage, extract water, dry materials, and sanitize surfaces before repairs begin. One striking fact: mold can start growing in as little as 24 to 48 hours after flooding. By working with restoration professionals, you’ll reduce risks, restore structural integrity, and get your property back to safe, usable condition sooner.