
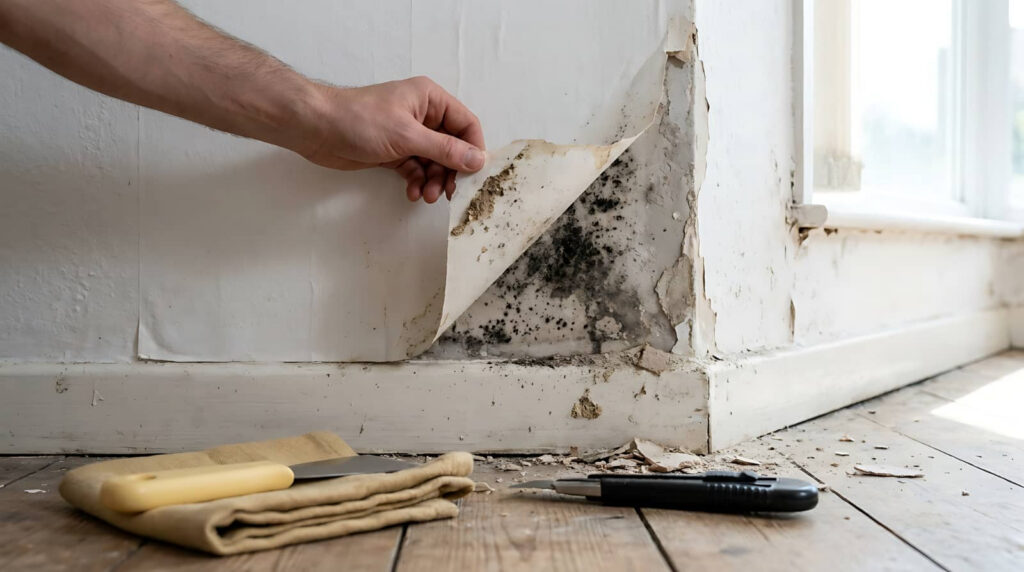
Nearly half of U.S. homes have detectable mold, and you can’t treat black mold as a simple cleaning job. You need to identify moisture, isolate the area, and wear proper protection before removal starts. If contamination exceeds 10 square feet or health symptoms appear, you should call a professional. The real challenge is stopping hidden growth before it returns, and that depends on what you do next.
Key Takeaways
- Identify and fix the moisture source before cleanup to prevent black mold from returning.
- Contain the area with plastic sheeting, close HVAC vents, and wear N95 respirator, gloves, and sealed goggles.
- Remove unsalvageable porous materials, clean nonporous surfaces, and dispose of contaminated debris safely.
- Dry the area thoroughly with fans and dehumidifiers, keeping indoor humidity below 60%.
- Call a professional for large, recurring, or hidden mold, especially after flooding, sewage, or if health risks exist.
What Is Black Mold Remediation?
Black mold remediation is the controlled process of identifying, containing, removing, and preventing toxic mold growth in a building. You use black mold remediation steps to limit exposure, protect materials, and restore safe indoor conditions.
First, you assess the affected area and isolate it to reduce spread. Next, you remove contaminated porous materials and clean nonporous surfaces with approved methods.
Then, you dry the space thoroughly and correct the moisture source so the growth can’t return. You also verify that cleanup meets safety expectations before reoccupying the area.
When you follow these steps carefully, you protect your household and support a healthier environment. If you’re facing this issue, you’re not alone, and a disciplined process can help you regain control with confidence.
Spot the Signs of Black Mold
Before you start any cleanup, look for the signs that point to active mold growth: a persistent musty odor, visible dark spotting or discoloration on walls, ceilings, or baseboards, and moisture damage such as staining, peeling paint, or warped materials.
You should inspect damp areas closely, including around sinks, windows, HVAC vents, and basement corners. Check for soft drywall, bubbling surfaces, or recurring condensation, since these conditions help mold spread.
If you see fuzzy patches, slimy films, or a cluster of spots that keep returning after drying, treat the area as suspect. Trust your senses and document what you find.
Acting early helps you protect your home and stay aligned with others who care about safe, healthy indoor spaces.
Know When to Call a Pro
When should you bring in a professional? You should call a certified mold remediator when the growth covers more than 10 square feet, keeps returning, or appears after sewage, flooding, or hidden water damage.
If you smell a persistent musty odor, see fuzzy black patches, or notice warped materials, don’t keep testing the limits yourself.
When anyone in your household has asthma, allergies, or immune suppression, your margin for error is smaller, so you need expert help.
A pro can assess contamination, use containment, and remove affected materials with proper PPE and filtration.
You stay safer by avoiding unnecessary disturbance, which can spread spores.
Trust the process, ask for written scope, and choose a contractor who follows accepted remediation standards.
Find the Source of Moisture
Once you’ve decided remediation is necessary, the next step is to trace the moisture source feeding the growth. You should inspect roofs, plumbing lines, supply valves, drain pans, windows, basements, and crawlspaces for leaks, seepage, condensation, or past flooding.
Check adjacent materials too, because water can travel behind drywall, under flooring, and into insulation before you see visible staining. Use a moisture meter if you have one, and note any elevated readings near the affected area.
Fix the source before you remove contaminated material, or the mold will likely return. If you’re part of a household, keep everyone informed so you can coordinate repairs and avoid rewetting the area.
When the cause isn’t obvious, document your findings and bring in a qualified leak detection or plumbing professional.
Set Up Safe Containment
Set up containment as soon as the moisture source is fixed, so you don’t spread spores during removal. You should isolate the work area with 6-mil plastic sheeting and seal seams with tape to create a tight barrier.
Close HVAC registers and cover door gaps so airborne particles stay where you’re working. If the affected space has direct outside access, route debris out that way to protect the rest of the home.
- Mark the boundary clearly.
- Maintain negative pressure when possible.
- Limit entry to the contained zone.
Check the barrier often for tears, loose edges, or gaps, and repair them immediately.
Careful containment helps your household stay safer and keeps the cleanup controlled, predictable, and manageable.
Use the Right Protective Gear
Wear the right protective gear before you disturb any moldy materials, because even small cleanup tasks can release spores and dust into the air.
Choose an N95 respirator or, for heavier exposure, a higher-rated respirator that fits snugly and seals well. Wear nonporous gloves, such as nitrile or rubber, to reduce skin contact and keep your grip steady. Protect your eyes with sealed goggles, not open safety glasses.
Put on disposable coveralls with boot covers, or dedicated work clothes you can launder separately. If you’ll kneel or handle rough surfaces, add knee protection under the suit.
Check each item for tears, gaps, or poor fit before you begin. When you gear up correctly, you help protect yourself and support a safer cleanup for everyone involved.
Remove and Dispose of Moldy Materials
You should first identify which materials can be salvaged and which are too contaminated to keep, since porous items often retain mold growth.
Remove unsalvageable debris carefully, then seal it in heavy-duty bags or wrapped sheeting before disposal.
Keep the work area contained, and avoid transporting loose mold residue through clean spaces.
Identify Salvageable Materials
A careful assessment of every affected material determines what can be cleaned and what must be discarded. You should inspect each item for porosity, structural damage, and visible colonization.
Nonporous surfaces often remain salvageable if you can clean them thoroughly and dry them fast. Semi-porous materials may be recoverable when contamination is limited. You’re part of a team when you document findings carefully and make conservative decisions.
- Sealable, intact metal or glass
- Dense wood with minor surface growth
- Dry, lightly stained textiles only if contamination stayed superficial
If you’re unsure, treat the material as unsalvageable. Avoid mixing confirmed salvageable items with damaged ones.
Keep your workflow organized, label each piece clearly, and protect nearby occupants by limiting handling time.
Seal And Discard Debris
Bag all unsalvageable materials immediately to prevent spores from spreading during removal.
You should place contaminated drywall, carpet, insulation, and porous debris into heavy-duty plastic bags, then seal each bag with tape before moving it through the clean area.
Double-bag items when the load is damp or friable. If you must cut larger sections, keep the work area under negative pressure and avoid tearing fibers.
Label the bags as mold-contaminated waste, and remove them from the home without delay.
Follow local disposal rules, since some jurisdictions require special handling.
After disposal, wipe nearby surfaces with a damp cloth and HEPA vacuum the floor.
When you follow these steps, you protect your crew, your household, and the shared space you’re restoring.
Clean and Disinfect Affected Surfaces
Once the contaminated materials are removed, professionals clean and disinfect all remaining affected surfaces to reduce residual mold and limit cross-contamination.
You should scrub hard, nonporous areas with detergent and water first, then apply a mold-effective disinfectant labeled for the surface. Use gentle pressure to avoid spreading spores, and change cloths often so you’re not reintroducing contamination.
If you’re working with a team, coordinate each pass to keep the area controlled and consistent.
- Clean visible film and dust thoroughly
- Disinfect according to label contact time
- Dispose of used wipes and tools safely
Inspect seams, corners, and fixtures carefully after treatment. If staining or growth remains, repeat the process before anyone reoccupies the space.
Dry the Area and Lower Humidity
Drying the area thoroughly is essential after cleanup, because lingering moisture lets mold return quickly. You should run fans to move air across damp surfaces, but keep airflow directed out of the affected room so you don’t spread spores.
Use a dehumidifier to pull water vapor from the air, and empty it often so it keeps working efficiently. Check hidden spots such as wall cavities, baseboards, and under flooring, because trapped moisture can persist there.
Measure relative humidity with a hygrometer and aim for levels below 60 percent. If materials stay wet after 24 to 48 hours, you may need professional drying equipment. Staying consistent here helps your home feel safer, cleaner, and more controlled for everyone involved.
Prevent Black Mold From Coming Back
To prevent black mold from coming back, you need to fix every moisture source, including leaks, condensation, and drainage problems.
You should also improve ventilation in bathrooms, kitchens, attics, and crawl spaces so damp air can’t linger.
Monitor indoor humidity regularly, and keep it below 60% to reduce the chance of renewed growth.
Fix Moisture Sources
Before you restore materials, identify and correct the moisture source that allowed black mold to grow, because remediation will fail if water intrusion continues. You should inspect plumbing, roof penetrations, foundation cracks, and appliance leaks, then verify that each repair stays dry under normal use.
If you miss the source, spores can rebound inside the same affected area, even after thorough cleanup.
- Seal active leaks and replace failed components.
- Patch damaged building envelopes with compatible materials.
- Remove standing water and dry wet substrates promptly.
Document what you fixed, test for recurring dampness, and recheck after rain or heavy water use.
When you address the cause directly, you protect your space and help your household feel secure, informed, and confident that the problem won’t return.
Improve Ventilation
Improving ventilation helps keep humidity low enough that black mold can’t reestablish itself after cleanup. You should run exhaust fans in bathrooms, kitchens, and laundry areas whenever moisture is generated, and keep them operating long enough to clear damp air.
Open windows when outdoor conditions are dry and safe, and use cross-ventilation to move stale air out of enclosed rooms. If your home has an HVAC system, verify that supply and return vents aren’t blocked, and replace clogged filters on schedule.
In tight areas like closets or basements, add dedicated air movement so air doesn’t stagnate. When you improve airflow consistently, you support a healthier indoor environment and help protect your household from another mold outbreak.
Monitor Humidity Levels
Keep indoor humidity between 30% and 60% so black mold doesn’t have the moisture it needs to return. You should verify levels with a calibrated hygrometer, not guesswork.
Check basements, bathrooms, kitchens, and laundry areas daily, since these spaces often trap damp air. If readings climb above 60%, act quickly to reduce moisture before spores reestablish.
- Run dehumidifiers in closed, affected rooms.
- Fix leaks, sweating pipes, and drainage issues.
- Dry wet materials within 24 to 48 hours.
Track readings in a log so you can spot patterns and respond early. When you stay consistent, you protect your home and help your household feel safer, together, with fewer conditions that support renewed contamination.
Frequently Asked Questions
How Long Does Professional Black Mold Remediation Usually Take?
You’ll usually see professional black mold remediation take one to five days, though severe infestations can take longer. You’ll need inspection, containment, removal, drying, and clearance testing, all depending on affected area size and moisture source.
Is Black Mold Remediation Covered by Homeowners Insurance?
It’s sometimes covered, but you’ll need to check your policy, cause, and exclusions. You’re more likely covered for sudden, accidental water damage; gradual leaks, neglect, and maintenance issues usually aren’t. Contact your insurer promptly.
Can I Stay Home During Black Mold Removal?
Usually, you shouldn’t stay home during removal; you’ll reduce exposure by leaving, especially if containment’s limited. If you must remain, you’ll need sealed barriers, negative air, and professional clearance testing before reentering.
How Much Does Professional Black Mold Remediation Cost?
You’ll typically pay $500 to $6,000, but extensive contamination can exceed $10,000. You should get multiple inspections, because your final price depends on square footage, hidden damage, containment needs, and required demolition.
Do Air Purifiers Help After Black Mold Cleanup?
Yes, air purifiers can help after cleanup, but you shouldn’t rely on them alone. You’ll need HEPA filtration, source removal, and moisture control. If you keep the room sealed, you’re ahead of the game.
Recap
If you spot black mold, you should act quickly and safely. For example, if a bathroom leak has spread mold across a wall and your family is coughing, you should fix the leak, isolate the area, and call a professional if the growth exceeds 10 square feet. You’ll protect yourself by containing the space, wearing proper gear, removing contaminated materials, and drying everything thoroughly. Then, you’ll reduce humidity and prevent regrowth.