
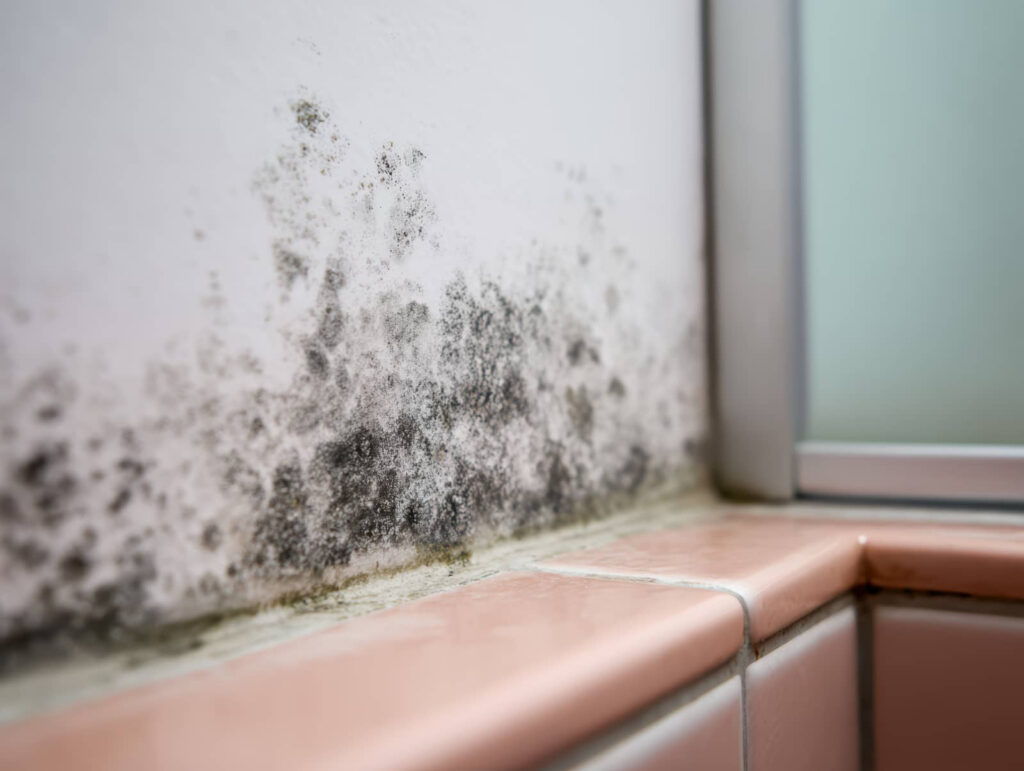
After water damage, you need mold remediation to stop hidden growth before it spreads further. You’ll see inspection, containment, cleaning, drying, and, when needed, removal of damaged materials. The process sounds simple, but each step depends on moisture levels, material type, and how long the area stayed wet. Costs and timelines can change fast, and the real question is what gets saved versus what has to go.
Key Takeaways
- Mold remediation after water damage starts with inspection, moisture detection, and identifying contaminated materials.
- Containment uses plastic sheeting, negative air pressure, and HEPA filtration to stop spores spreading.
- Porous materials with heavy mold damage are removed, while salvageable surfaces are cleaned and sanitized.
- Drying with fans and dehumidifiers is essential before repairs to prevent mold from returning.
- Costs and timelines vary by damage extent, but prevention requires humidity below 60% and regular moisture checks.
What Mold Remediation After Water Damage Means
When water damage creates the right conditions for mold growth, mold remediation is the process of identifying, removing, and cleaning contaminated materials so you can restore a safe indoor environment.
In mold remediation after water damage, you’re not just wiping surfaces; you’re controlling moisture, containing spread, and treating affected building materials with a methodical plan.
A trained team may isolate the work area, remove porous items that can’t be salvaged, and clean remaining surfaces with appropriate agents. They also dry structural components to help prevent recurring contamination.
This process protects your home’s air quality and helps you feel confident that your space supports health, comfort, and belonging again.
Signs You Need Mold Remediation
How do you know it’s time for mold remediation after water damage? You may notice a persistent musty odor, visible growth on drywall, baseboards, or insulation, and staining that keeps returning after cleaning.
Your walls, ceilings, or floors can feel damp, soft, or warped, which signals moisture has stayed trapped long enough for colonies to spread. You might also see peeling paint, bubbling wallpaper, or dark spotting around vents and windows.
If family members start coughing, sneezing, or feeling irritated indoors, that’s another warning sign.
Don’t wait for the problem to widen. Quick action helps protect your home’s structure and your household’s comfort. When you address these signs early, you join other homeowners who restore safer, healthier rooms before contamination takes hold.
How Mold Inspectors Test for Damage
Before remediation begins, mold inspectors test the affected areas to confirm where damage has spread and how far moisture has penetrated. You’ll usually see them use moisture meters, thermal imaging, and direct visual checks to map wet materials and hidden growth.
They may lift small surface samples or collect air samples to compare indoor spore levels with outdoor conditions. This testing helps you understand whether drywall, insulation, flooring, or framing needs cleaning or removal.
Inspectors also document odors, staining, and structural dampness so you get a clear damage profile. When you work with a skilled inspector, you’re not guessing—you’re getting data that guides safe, targeted remediation and helps your home feel secure again.
Containment Steps That Stop Mold Spread
Once inspectors confirm the extent of contamination, containment becomes the next critical step to keep mold from spreading during remediation.
You’ll usually see the affected area sealed off with plastic sheeting and taped seams, creating a controlled work zone that protects the rest of your home. Technicians may set up negative air pressure so airborne spores move inward, not outward, and use HEPA-filtered air scrubbers to capture particles.
They’ll also block vents, close doors, and establish entry points for workers only. If materials are heavily affected, you’ll often be asked to limit access until the barrier is in place.
These measures help you feel confident that the problem stays localized, so your household can move toward recovery with less disruption and more peace of mind.
How Mold Removal and Cleaning Work
You’ll start with a mold inspection that maps visible growth, hidden moisture, and affected building materials so the remediation plan targets the full contamination area.
Next, you’ll remove porous materials that can’t be safely cleaned, such as damaged drywall, insulation, or carpeting, to stop mold from remaining in the structure.
Then you’ll clean and sanitize salvageable surfaces with appropriate methods and agents, reducing spores and residues while restoring a safe indoor environment.
Mold Inspection Process
During a mold inspection, professionals identify where moisture has supported growth, assess how far contamination has spread, and determine which materials need removal or cleaning.
You can expect them to map affected rooms, check hidden cavities, and compare visible staining with humidity readings, temperature, and moisture meter data.
They’ll inspect drywall seams, baseboards, insulation, and HVAC returns, because mold often follows water paths you can’t see.
When needed, they may collect air or surface samples to confirm species and guide cleanup.
You stay informed through clear findings, photos, and a step-by-step plan, so you know what’s happening and why.
This process helps your home team make precise decisions, reduces guesswork, and sets up safe, effective remediation that gets your space feeling like yours again.
Contaminated Material Removal
Contaminated material removal is where remediation turns from assessment to action, and the goal is to eliminate mold growth without spreading spores to clean areas.
You’ll see technicians isolate the work zone, control airflow, and remove porous materials that can’t be safely restored, such as saturated drywall, insulation, carpet pad, and damaged ceiling board.
They bag debris as they go, keep dust down, and use tools that limit disturbance. This step matters because mold can penetrate deeply, not just sit on the surface.
You’re not left guessing; crews document what comes out and why, so you understand the scope.
When the damaged material is gone, your space has a cleaner baseline for the next phase, and you can feel confident that the worst contamination is already out.
Cleaning And Sanitizing
Next, technicians clean the remaining surfaces and sanitize affected areas to reduce any mold residue that contamination removal may have left behind.
You’ll see them scrub framing, subfloors, and hard surfaces with HEPA vacuuming, detergent washing, and damp wiping to lift dust, spores, and biofilm.
Then they apply EPA-registered antimicrobials that target microbial growth without soaking materials unnecessarily. This step matters because even small residue can trigger odor, staining, or renewed colonization.
If porous items remain, they’re treated carefully or replaced based on condition. Throughout the process, your team checks moisture levels so cleaned areas dry fast and stay stable.
You’re not just getting a wipedown—you’re getting a controlled reset that helps your home feel safe, familiar, and ready for the next phase of restoration.
Drying and Repairs After Mold Removal
Once the mold is removed, you’ll need to dry the affected materials completely and complete any necessary repairs to prevent the problem from returning.
Use fans, dehumidifiers, and controlled airflow to lower moisture in walls, floors, and framing. You should monitor humidity and moisture readings until they return to safe levels.
Inspect hidden spaces, such as cavities and subfloors, so you don’t leave damp areas behind. After drying, repair damaged surfaces, seal small gaps, and restore finishes that protect the building envelope.
If you address these details carefully, you help your home feel healthy and dependable again.
Your remediation team can explain which materials are ready for reassembly and which need follow-up verification, so you stay informed, confident, and connected throughout the recovery process.
When Materials Must Be Removed
When materials have absorbed water long enough to lose structural integrity or support hidden mold growth, they must be removed rather than cleaned in place. You’ll often see this with swollen drywall, softened insulation, delaminated flooring, or wood that stays damp inside its core.
Your remediation team will inspect each surface, probe suspect areas, and open cavities when needed to confirm the extent of contamination. If mold has penetrated porous materials, cleaning won’t reliably reach it, so removal protects your indoor air and helps your home recover with confidence.
Contractors bag and seal debris, then dispose of it according to local rules. That process may feel disruptive, but it’s the safest path for your household and the clearest way to support complete restoration.
How Long Mold Remediation Takes
The timeline for mold remediation depends on how far the damage has spread, how much material needs removal, and how quickly the affected areas can dry. In a small, contained area, you might finish in a few days.
Larger jobs can take a week or more because crews must set containment, remove damaged materials, clean surfaces, and verify dryness. You’ll usually see progress in stages: inspection, containment, demolition, filtration, cleaning, drying, and final clearance.
Moisture readings guide each step, so your team won’t rush before conditions are safe. If you stay available for questions and keep access clear, you help the work move smoothly.
The process can feel intense, but you’re not steering it alone; each step brings your space closer to normal.
Mold Remediation Costs Explained
Mold remediation costs depend on the size of the affected area, the extent of moisture damage, and how much material your crew must remove and replace.
You’ll usually pay for inspection, containment, HEPA filtration, demolition, cleaning, drying, and clearance testing. Small, localized jobs may stay modest, while larger projects with wall, ceiling, or flooring replacement can climb quickly.
Your final bill also reflects access difficulty, contamination level, and whether licensed specialists handle HVAC or structural components.
A detailed estimate should break out labor, equipment, disposal, and reconstruction so you can compare bids confidently.
When you know where each charge comes from, you can plan with your team, reduce surprises, and move forward feeling informed and supported.
How To Prevent Mold After Repairs
After repairs, you can prevent mold by keeping indoor humidity below 60%, running exhaust fans in bathrooms and kitchens, and making sure every repaired area dries completely before you close walls or reinstall finishes.
Use a hygrometer to check moisture daily, and keep it in the living space you use most. Inspect caulking, supply lines, and window frames for leaks, because small failures can reactivate hidden dampness.
Replace wet insulation, damaged drywall, and warped flooring only after materials reach safe moisture readings. If you share your home with others, agree on ventilation and housekeeping routines so everyone helps protect the space.
Maintain clean gutters, direct downspouts away from the foundation, and schedule follow-up inspections after major storms. These habits keep your home healthier and your team supported.
Frequently Asked Questions
Can I Stay Home During Mold Remediation?
You can sometimes stay home, but you shouldn’t if crews isolate your rooms, use negative air machines, or remove contaminated materials. You’ll stay safer by following their guidance and limiting access.
Will Insurance Cover Mold Remediation Costs?
Usually, you’re covered if your policy includes sudden water damage; you’ll pay if it’s from neglect. You’ll review coverage, document losses, and file quickly. You’ll protect your home, your claim, and your peace.
Do I Need to Throw Away All Furniture?
No, you don’t need to throw away all furniture. You’ll keep salvageable pieces after inspection, cleaning, and drying; only porous items with visible mold, swelling, or persistent odor usually need replacement.
Is Black Mold More Dangerous Than Other Mold?
Not necessarily; you can’t judge danger by color alone. You’ll reduce risk by treating any visible mold seriously, because species, exposure, and moisture matter more. You should test, contain, and remediate promptly.
How Can I Choose a Qualified Remediation Company?
Look for certified, insured experts with IICRC training, strong references, and clear protocols; you’ll want documented containment, moisture mapping, and post-remediation testing. Like a trusty lantern, they’ll guide you toward a safer, healthier home.
Conclusion
If you’ve had water damage, don’t treat mold like a tiny nuisance—it can explode into a full-blown indoor disaster fast. You’ll want fast inspection, strict containment, thorough cleaning, and aggressive drying to stop hidden growth in its tracks. The sooner you act, the less you’ll pay and replace. Once repairs are done, keep humidity low and inspect regularly. With the right steps, you can restore your space and keep mold from staging a comeback.