
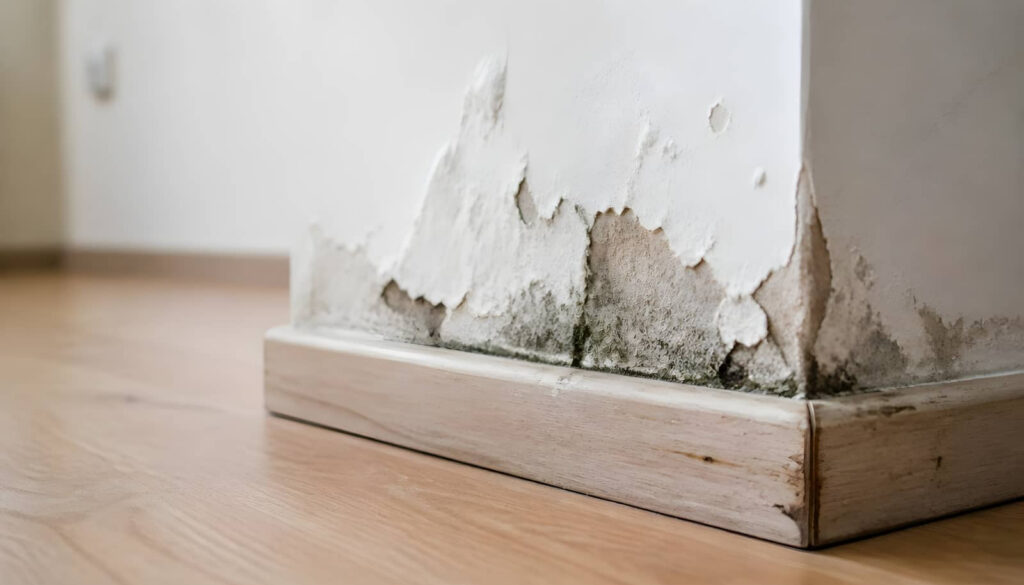
When you compare professional mold remediation with DIY mold removal, you’re really weighing scope, containment, and verification against cost and convenience. You can handle small, isolated growth on hard surfaces with basic cleaning, but hidden moisture, porous materials, or recurring contamination changes the equation fast. The real question isn’t just what you can see; it’s what you might miss, and that difference often determines the next step.
Key Takeaways
- DIY is suitable only for small, visible mold on nonporous surfaces; professionals handle hidden contamination and moisture sources.
- Professional remediation uses containment, negative air pressure, and HEPA filtration to prevent spore spread during cleanup.
- If mold covers more than 10 square feet, affects porous materials, or returns repeatedly, professional help is recommended.
- Mold exposure can worsen asthma, allergies, and other health issues, especially when disturbed materials release spores into the air.
- DIY may be cheaper upfront, but professionals provide inspection, removal, and verification for more thorough and reliable results.
DIY vs Professional Mold Removal: Key Differences
DIY mold removal can handle small, visible growth on nonporous surfaces, but it often misses hidden contamination and doesn’t address the moisture source that caused the problem.
You can scrub a limited area, but professional mold remediation vs diy differs in containment, diagnostics, and verification.
Professionals use moisture mapping, HEPA filtration, negative pressure, and targeted material removal to limit spore spread and reduce recontamination.
DIY methods usually rely on surface cleaning and consumer-grade products, which may leave colonies within drywall, insulation, or subflooring.
If you want your space to feel safe and stable, you need a process that treats the cause, not just the stain.
That’s why the two approaches aren’t equivalent in scope, control, or measurable effectiveness.
How to Decide Between DIY and Professional Help
You should first assess the mold size, since small, localized growth may suit DIY cleanup while larger or hidden contamination usually requires professional remediation.
You also need to evaluate health risk factors, because visible mold, sewage exposure, or respiratory conditions increase the need for expert handling.
Compare cost against expertise by weighing equipment, containment, and verification against the expense of hiring a trained remediator.
Mold Size Assessment
A small patch of mold can often be addressed with basic cleaning, but size is a key factor in deciding when professional remediation is necessary.
You can usually handle spots smaller than about 10 square feet if the growth is limited to one surface and you can fully access it.
Once mold spreads across multiple materials, hides behind walls, or covers a larger area, DIY methods become less reliable.
Measure the affected area, note how many rooms are involved, and check whether the material is porous or damaged.
If you’re unsure, choose the safer, more coordinated path and bring in a certified team.
Clear sizing criteria help you act with confidence, protect your space, and stay aligned with others who value a controlled, effective response.
Health Risk Factors
Size tells only part of the story; health risk should guide the final decision between cleaning it yourself and calling a professional.
You should treat any visible mold as a potential airborne exposure source, especially if you live with asthma, allergies, immune suppression, or chronic respiratory disease. Disturbing contaminated materials can release spores, fragments, and microbial byproducts into shared air, increasing inhalation risk for everyone in the space.
If you smell a strong musty odor, notice water-damaged porous materials, or see mold after sewage or flood exposure, your risk rises further. When you’re protecting your household, use containment, filtration, and proper protective equipment.
If symptoms appear during cleanup, or you’re unsure about the extent of contamination, professional remediation offers a safer, more controlled path for your home and community.
Cost Vs Expertise
Cost is only one part of the decision; expertise determines whether cleanup fully removes contamination or simply hides it. You can save money with DIY methods, but you also accept greater uncertainty about source control, containment, and moisture correction.
Professional remediation costs more because trained teams inspect, isolate, remove, and verify. If you’re comparing options, weigh:
- visible growth size and spread
- hidden moisture or wall intrusion
- your ability to use PPE and containment
- the need for post-cleanup testing
DIY fits small, nonporous areas with a known leak you’ve already fixed.
Professional help fits recurring growth, HVAC involvement, or health-sensitive spaces. When you choose the right path, you protect your space and join a safer, better-informed community.
Which Mold Problems Are Safe to DIY?
You can usually handle small surface mold on non-porous materials, such as tile, glass, or sealed metal, if the affected area is limited and the growth is superficial.
You should also address minor moisture sources, like a small leak or brief condensation event, because controlling the moisture is essential to prevent recurrence.
If the mold spreads beyond a small area, penetrates porous materials, or returns after cleaning, you’ll need professional remediation.
Small Surface Mold
Small surface mold can be a DIY project when the growth stays limited, sits on nonporous materials, and hasn’t spread beyond a small area. You should act quickly, because delay lets spores disperse and complicates cleanup.
Before you start, confirm these conditions:
- Area is under 10 square feet
- No visible hidden damage
- No strong musty odor
- No health symptoms during exposure
If you meet them, you can clean with standard safety precautions and keep the workspace contained. Use disposable gloves, eye protection, and ventilation.
Avoid dry scrubbing, which can aerosolize spores. You’re part of a group of homeowners who can handle minor contamination safely when you stay disciplined, assess limits, and stop if the growth returns or expands.
Non-Porous Materials
Non-porous surfaces are the safest DIY category because mold stays on top of materials like glass, metal, glazed tile, and sealed plastic instead of penetrating deeply.
You can usually remove this growth with detergent, water, and thorough drying if the affected area is small and the surface remains structurally intact.
Wear gloves, eye protection, and an N95 respirator, and isolate the work zone so you don’t spread spores into shared spaces.
Scrub until the visible film is gone, then rinse and dry completely.
If staining persists, the material is damaged, or you see recurring growth after cleaning, you’re no longer dealing with a simple surface issue.
At that point, professional remediation gives you the containment, verification, and confidence your home deserves.
Minor Moisture Sources
Minor moisture sources can be safe to DIY when you catch them early and correct the cause quickly, such as a brief plumbing drip, a window leak, a damp basement corner, or condensation around HVAC components.
You can usually handle these if the affected area is small, surfaces are non-porous, and no odor or hidden damage suggests broader growth. Act fast, dry the area, clean visible mold with detergent, and fix the moisture path.
- Shut off the water source
- Dry within 24 to 48 hours
- Discard soaked porous materials
- Monitor for recurring dampness
If mold returns, spreads, or you suspect wall or subfloor saturation, you’ll want a professional team. That choice protects your home and keeps you aligned with others who value safe, practical solutions.
When to Call a Mold Remediation Pro
When mold spreads beyond a small, isolated area, or you suspect hidden growth in walls, ceilings, HVAC systems, or insulation, you should call a mold remediation professional.
You also need expert help if contamination follows a roof leak, flood, sewage backup, or persistent humidity problem.
If you notice musty odors, recurring discoloration, warped materials, or symptoms that worsen in affected rooms, your team should treat the space as a potential source.
Professionals assess extent, identify moisture drivers, and use containment, filtration, and disposal methods that reduce cross-contamination.
If your household includes people with asthma, allergies, or immune concerns, don’t delay.
Choosing qualified remediation gives you a safer standard and helps protect the shared spaces you rely on, while limiting uncertainty and repeat growth.
DIY Mold Removal Steps That Work
If the mold covers only a small, isolated area and the material is hard, nonporous, and fully dry, you can often remove it yourself with careful preparation.
Wear gloves, goggles, and an N95 respirator, then keep the room ventilated. Clean the surface with detergent and water, scrub until visible growth is gone, and dry it completely.
- Dampen the area lightly before wiping.
- Bag disposable cloths right away.
- Use separate tools for the job.
- Inspect nearby surfaces for spread.
You should stop if the area expands, the material stays damp, or you smell a persistent musty odor.
After cleaning, monitor the spot for recurring discoloration. By following these steps, you can handle a limited problem confidently and protect your household team.
How Pros Contain and Remove Mold
Professional mold remediation starts by isolating the affected area so spores don’t spread during removal.
You’ll see pros seal openings with plastic barriers, establish negative air pressure, and route air through HEPA filtration. They remove contaminated porous materials that can’t be cleaned, then scrub remaining surfaces with detergent or approved antimicrobials.
You’ll also notice they use HEPA vacuums to capture fine particles before and after cleaning. Moisture sources get identified and corrected so the colony can’t return.
Throughout the job, they wear PPE, monitor conditions, and verify that adjacent spaces stay protected. This process helps you join a controlled, safety-focused cleanup standard that reduces cross-contamination and leaves your space ready for post-remediation inspection.
DIY vs Professional Mold Removal Costs
DIY mold removal can look cheaper upfront, but the real cost often includes hidden risks, limited containment, and the chance of repeated growth if moisture isn’t fixed.
You may spend less on supplies, yet you can still face higher losses from spread, disposal, and follow-up cleaning.
Professional remediation usually costs more at first, but it includes assessment, containment, filtration, and verified removal.
For your household, that often means fewer surprises and a cleaner return to normal.
- DIY materials: low initial expense
- PPE and tools: added costs
- Professional labor: higher upfront pricing
- Rework from failure: often the largest cost
If you want your space to stay safe and your crew to avoid unnecessary exposure, compare total lifecycle cost, not just the invoice.
How to Choose the Right Option
How do you decide between professional remediation and DIY removal? You should assess the affected area, moisture source, and your exposure risk.
If mold covers more than 10 square feet, recurs after cleaning, or appears in HVAC systems, you’ll usually need certified remediation.
Choose DIY only for small, nonporous surfaces with visible growth and no hidden damage. You can contain minor spots with gloves, respirator, and ventilation, but you must fix the moisture problem first.
If anyone in your home has asthma, allergies, or immune compromise, professional help is the safer fit.
Compare containment, testing, and disposal requirements, then select the option that protects your household and preserves your peace of mind as a team.
Frequently Asked Questions
How Long Does Mold Remediation Usually Take?
Mold remediation usually takes one to five days, but you’ll need longer for extensive contamination, hidden moisture, or structural repairs. You should expect inspection, containment, removal, drying, and verification before you reoccupy safely.
Will Mold Come Back After Treatment?
Yes, mold can return after treatment if you don’t fix moisture sources, ventilation, or hidden contamination. You’ll reduce recurrence by drying areas quickly, repairing leaks, and monitoring humidity below 60%.
Does Homeowners Insurance Cover Mold Removal?
Usually, you’ll need a covered cause, like sudden water damage; insurers deny most mold claims. You should review your policy, document damage, and get professional assessment to protect your coverage and home.
Can Mold Affect Indoor Air Quality Long-Term?
Yes, mold can degrade your indoor air quality long-term by releasing spores and microbial compounds. You’ll notice persistent odors, irritation, and allergy symptoms unless you control moisture and remove growth promptly.
What Certifications Should a Mold Remediator Have?
You should look for IICRC, ACAC, or state mold assessor/remediator licenses; you’ve also got to verify OSHA training, EPA lead-safe credentials if needed, and insurance. These certifications show you’re hiring a qualified, compliant specialist.
Summary
When you compare professional mold remediation vs DIY mold removal, the key difference is control of hidden contamination. DIY can work for small, nonporous spots, but professionals address moisture sources, airborne spores, and structural impact. Many U.S. homes have some visible or hidden dampness, which increases mold risk. If you can’t trace the source, or if the affected area is large, you’ll get safer, more durable results by calling a pro.