
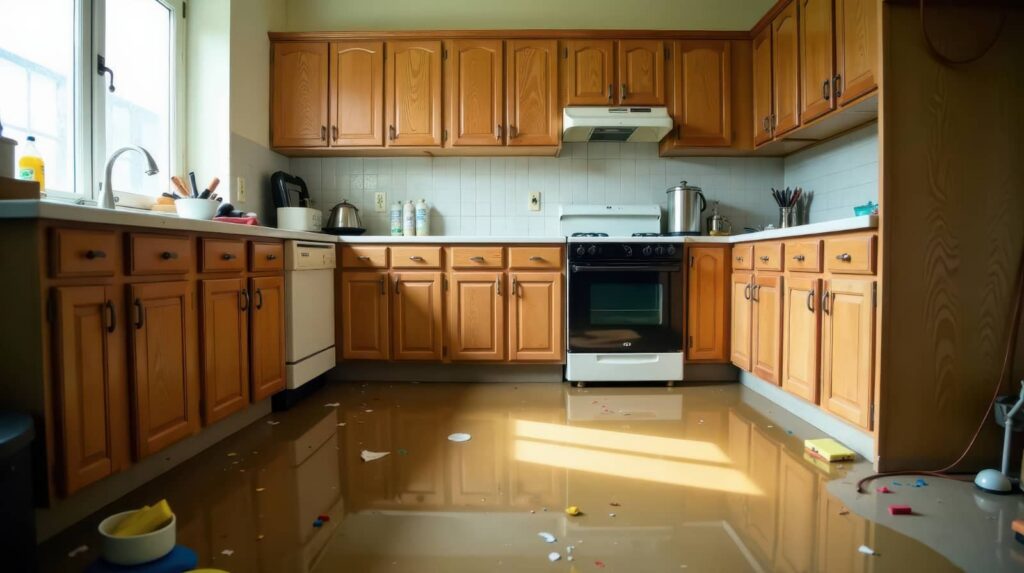
When floodwater hits your home, you need to act fast and in the right order. Flood Damage Restoration starts by making the space safe, then inspecting and documenting every affected area before removing water, drying materials, and sanitizing surfaces. If you miss hidden moisture, mold can spread quickly and repairs get more costly. The next steps can determine how well your home recovers.
Key Takeaways
- Prioritize safety: shut off power if safe, wear protective gear, and avoid entering if structural damage is visible.
- Document all flood damage immediately with photos, videos, waterlines, dates, and an itemized inventory for insurance claims.
- Remove standing water and saturated materials quickly to reduce mold growth and further structural damage.
- Dry, clean, and sanitize affected areas using fans, dehumidifiers, detergent, and EPA-registered disinfectants.
- Hire flood restoration professionals for hidden moisture detection, contamination assessment, and complete repair planning.
Make the Home Safe to Enter
Before you step inside, make sure the home is safe to enter. Shut off electricity at the main breaker if you can do so without standing in water, and avoid gas leaks by leaving the area if you smell fuel.
Wear boots, gloves, and a mask to protect yourself from contaminated water, sharp debris, and mold spores. Open windows only if the structure feels stable and the air outside is safe.
Check for sagging ceilings, warped floors, and broken glass before moving farther in. If you see structural damage, call professionals and wait.
In flood damage restoration, safety comes first because it lets your crew work efficiently and protects your household from preventable injury.
You’re not alone; careful steps now help your recovery start strong.
Inspect Damage and Document It
Once the home is safe to enter, inspect every affected area and document the damage right away.
Move room by room and note stains, warped trim, cracked drywall, swollen flooring, and any visible electrical or structural concerns.
Take clear photos and video from multiple angles, including close-ups and wide shots that show context.
Record dates, times, waterlines, and the source if you can identify it.
Keep a written log of damaged items, model numbers, and estimated purchase dates.
Save receipts, insurance forms, and contact details in one folder so you can share them easily.
This careful record helps you communicate with adjusters, contractors, and your support network, and it strengthens your claim while keeping your recovery organized and steady.
Remove Standing Water and Wet Materials
You should extract standing water as quickly as possible with pumps, wet vacs, or other appropriate equipment to reduce further structural damage.
Remove saturated materials like carpet, insulation, and drywall once they’ve lost their integrity and can trap moisture.
Dispose of damaged items that can’t be cleaned or dried safely so you can limit mold growth and speed up restoration.
Extract Standing Water
Fast water removal sets the stage for successful flood damage restoration. You should begin extraction with a submersible pump for deep water, then switch to wet vacuums for smaller pools and low spots.
Move methodically from the farthest point back toward an exit so you don’t trap yourself in rising moisture. Open doors and windows if conditions are safe, and use squeegees to guide water toward drains or collection points.
You’ll work faster when you keep hoses kink-free and power cords elevated. Check hidden areas like corners, beneath furniture, and inside crawl spaces, because water often lingers there.
As you extract, monitor the floor for shifting, buckling, or electrical hazards. Stay calm and follow the team plan; you’re restoring control one pass at a time.
Remove Saturated Materials
After extraction, pull out soaked materials that can’t be dried and salvaged quickly, including carpet padding, insulation, warped drywall, ceiling tiles, and heavily damaged furniture.
You’ll open wall cavities, lift baseboards, and remove any saturated underlayment so hidden moisture can’t linger. Work methodically in each room, and keep a debris path clear so you and your crew can move safely.
Separate salvageable items from structural components, and set them in a dry, ventilated area for later treatment. Check framing, subfloors, and trim for swelling or softness before you close anything back in.
This step reduces microbial growth, speeds drying, and helps the space recover faster. When you remove wet materials promptly, you protect the home’s structure and give your restoration team a cleaner, safer starting point.
Dispose Of Damaged Items
Dispose of damaged items as soon as possible to limit further deterioration and reduce health risks.
You should remove standing water first, then sort wet belongings into salvageable and unsalvageable groups.
Discard porous items that stay soaked, such as carpet padding, upholstered furniture, insulation, and food-contact materials.
Seal contaminated debris in heavy-duty bags or covered bins before moving it out of your home.
Wear gloves, boots, and a respirator if mold or sewage is present.
Keep salvageable items separate, clean them quickly, and place them in a dry, ventilated area.
Document losses with photos before disposal for insurance claims.
Work methodically with your household so everyone knows what stays, what goes, and where each item belongs.
Dry Walls, Floors, and Furniture
Once standing water is gone, you need to dry walls, floors, and furniture quickly to limit structural damage and stop mold from developing. Open windows if outdoor air is dry, but rely on fans and dehumidifiers to move moisture out faster.
Pull baseboards, lift carpet edges, and remove cushions so air can reach hidden damp spots. Check drywall for swelling and mark wet areas so you can monitor progress.
For hardwood, keep airflow steady and avoid trapping moisture with rugs or plastic. Wipe furniture frames, then separate pieces to dry all surfaces evenly.
You’re not alone in this process; steady, organized drying helps your home recover safely and gives your family a healthier space sooner.
Clean and Sanitize Flooded Areas
When surfaces are dry enough to work on, clean and sanitize every flooded area to remove dirt, bacteria, and residue that can keep odors and contamination behind.
Wear gloves, boots, and eye protection, then scrub hard surfaces with hot water and detergent. Rinse well so no cleaner film remains.
After washing, apply an EPA-registered disinfectant at the label’s stated dilution and contact time. Work from cleaner zones to dirtier ones, and change cloths or mop water often so you don’t spread contamination.
Dispose of soaked absorbent materials that can’t be fully cleaned. For cabinets, trim, tile, concrete, and sealed flooring, inspect seams and corners closely.
Keep the space open to fresh air while you work, and make sure every team member uses the same cleaning steps for consistent results.
Prevent Mold Growth
To prevent mold growth after flooding, dry the structure as quickly and completely as possible, since mold can start forming within 24 to 48 hours in damp materials.
You should run dehumidifiers, fans, and open windows when outdoor air is dry to pull moisture from the air and hidden cavities. Remove soaked contents that can’t dry fast enough, and keep indoor humidity below 60%.
Inspect closets, corners, and under sinks daily for musty odors or dark spotting. Act as a team with your restoration crew so no wet area gets missed.
- Sunlight on damp floors
- A humming dehumidifier in a quiet room
- Dry, lifted rugs with air moving beneath them
Repair Walls, Flooring, and Framing
After the structure is dry and inspected, you can start repairing walls, flooring, and framing by removing damaged materials, cutting back wet drywall above the flood line, and replacing warped studs, subflooring, and insulation as needed.
Use a utility knife and pry bar to expose clean, solid edges, then fasten new framing members square and level. Install moisture-resistant drywall where appropriate, tape seams, and apply joint compound in thin coats.
For floors, verify the joists and subfloor are dry before laying new underlayment or finish materials. If you’re restoring a room you care about, focus on tight fits and proper fastening so your space feels solid again.
Finish by sanding, priming, and sealing repaired surfaces before you move to paint or trim.
Document Damage for Insurance
Before you remove or replace anything else, document the flood damage for your insurance claim with clear, detailed evidence.
Take wide shots of each room, then close-ups of soaked materials, stain lines, warped trim, and damaged belongings. Include date stamps if your camera allows them, and note each item’s location so your insurer can connect the photo to the loss.
Create a simple inventory with descriptions, estimated age, and purchase records when you’ve got them. Keep receipts for cleanup supplies and temporary fixes, too.
Save files in one folder and back them up to the cloud or a drive. You’re not handling this alone; organized records help your claim move faster and support fair recovery.
- Waterline marks on walls
- Buckled hardwood and swollen baseboards
- Ruined furniture clustered by room
Call a Flood Restoration Pro
Call a flood restoration pro as soon as you’ve documented the damage and shut off any immediate hazards.
You’ll get trained technicians who assess contamination, extract standing water, dry hidden cavities, and protect your structure from mold and rot. They use moisture meters, infrared cameras, air movers, dehumidifiers, and antimicrobial treatments to verify that materials are safe to keep or must be removed.
When you work with a reputable team, you’re not handling recovery alone—you’re joining a process built to restore your home efficiently and correctly.
Ask for a written scope, timeline, and containment plan so you know what happens next. A qualified pro also coordinates with your insurer, helping you move from crisis to cleanup with confidence and a clear path forward.
Frequently Asked Questions
How Long Does Flood Damage Restoration Usually Take?
You’ll usually need three days to several weeks. You can dry materials fast, but repairs, mold prevention, and structural fixes extend timelines. Professionals assess damage, remove water, and restore your home safely.
What Should I Do With Valuables After a Flood?
You should remove valuables, dry them gently, and store them in clean, sealed containers; wet paper needs air-drying, while jewelry and electronics need careful professional inspection. Quick action protects cherished keepsakes, yet prevents costly secondary damage.
Can Floodwater Contaminate My HVAC System?
Yes, floodwater can contaminate your HVAC system, carrying bacteria, silt, and mold into ducts and equipment. You should shut it off, avoid using it, and have a qualified technician inspect, clean, and sanitize it.
Which Personal Safety Gear Is Best During Cleanup?
You’ll want waterproof boots, chemical-resistant gloves, eye protection, an N95 respirator, and long sleeves. If floodwater may contain sewage, upgrade to a P100 respirator and disposable coveralls, so you can clean safely and confidently.
How Do I Know if My Foundation Was Damaged?
Check for new cracks, uneven floors, sticking doors, tilted walls, or gaps around windows. You can also spot water intrusion and settlement after floods. If you’re unsure, have a structural engineer inspect it promptly.
Final Thoughts
You’ve seen that fast action matters: if floodwater sits for more than 24–48 hours, mold can begin to grow. That means your safest path is to secure the home, document every loss, remove water, dry all materials, and disinfect surfaces right away. You also need to know when to call a pro, since hidden moisture can damage framing and insulation. With a methodical response, you’ll restore your home more safely and efficiently.