
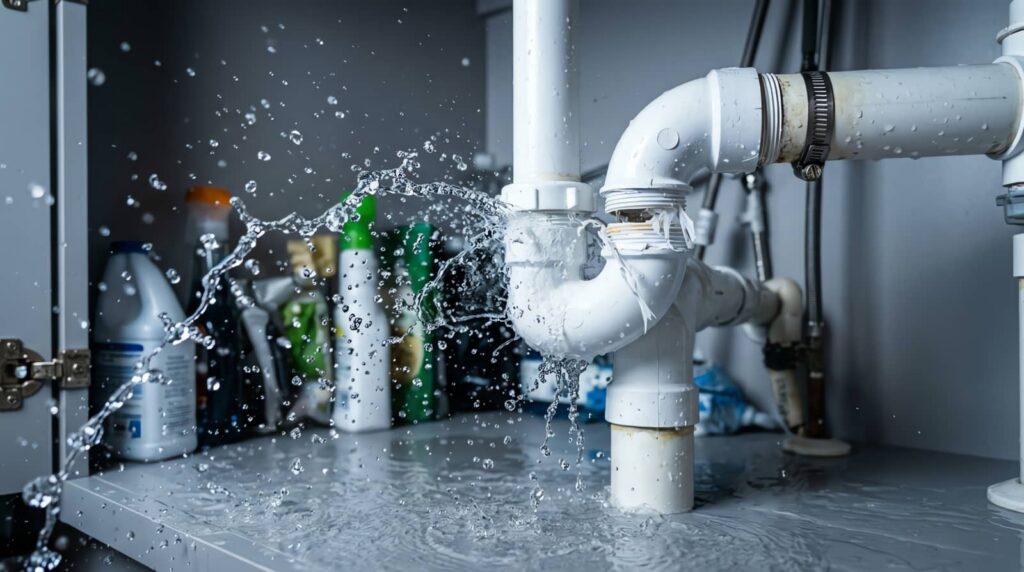
Key Takeaways
- Shut off the main water supply, cut electricity to affected areas, and move valuables away from the leak.
- Remove standing water quickly using pumps or extractors, working room by room to limit spread and damage.
- Dry the area with air movers and dehumidifiers, checking hidden moisture with meters in walls and floors.
- Clean and sanitize affected surfaces, then replace damaged drywall, flooring, or other porous materials.
- Call professionals if water reached electrical systems, structural areas, or odors and dampness remain after 24 hours.
What to Do Right After a Burst Pipe?
If a pipe bursts, you need to act fast: shut off the main water supply, cut power to any affected areas if it’s safe to do so, and move valuables out of the water’s path.
Then call for help and document the damage with photos so your burst pipe water cleanup process starts with clear records.
You can protect your space by removing rugs, furniture, and anything porous from the wet zone. Open doors and windows only if weather allows, because airflow helps limit secondary damage.
Don’t use household vacuums on standing water. Instead, focus on safety, containment, and quick reporting to your plumber and insurance provider.
You’re not handling this alone; a fast, organized response helps your home recover sooner and keeps the cleanup team working efficiently.
Stop the Leak and Cut Power Safely
First, you should shut off the main water supply to stop additional flooding and limit structural damage.
Next, disconnect electrical power to the affected area if you can do so safely, since standing water can energize outlets, appliances, and wiring.
If you’re unsure about any switchgear or the area is already wet, stay clear and call a qualified professional right away.
Shut Off Water Supply
Quickly shut off the main water supply to stop additional flooding and limit damage to floors, walls, and contents.
If you know where the main valve is, turn it clockwise until it’s fully closed. In many homes, you’ll find it near the water meter, in a basement, crawlspace, utility room, or outside wall.
If the pipe burst is isolated, you can also close the fixture’s local shutoff valve to reduce pressure while you work. Open a faucet nearby to relieve remaining line pressure and help water drain from the pipe.
If the valve won’t move or you can’t find it, call your water utility or a qualified plumber right away. Acting fast keeps you in control and helps your cleanup team protect your home together.
Disconnect Electrical Power
Once the water is under control, cut electrical power to the affected area at the breaker panel and keep out of standing water until it’s safe to enter. You’re protecting everyone, including yourself, from shock, short circuits, and hidden equipment damage.
If you can do so safely, switch off power to wet rooms, nearby outlets, and any circuits that may have been splashed. Never touch plugs, cords, or appliances with wet hands, and don’t step into water to reach the panel.
If the breaker box is in a damp area, wait for a qualified electrician or water damage pro to isolate it. This step lets your cleanup team work with confidence, start drying sooner, and keep your home’s recovery moving together, safely and efficiently.
Extract Standing Water
Once you’ve stopped the leak, you need to extract standing water as quickly as possible to limit damage.
You can use heavy-duty pumping tools to remove large volumes fast and reduce the risk of swelling, mold, and structural harm.
The sooner you start, the better you’ll protect the area and make drying more effective.
Rapid Water Extraction
The first priority is to remove standing water as fast as possible to limit structural damage and reduce the chance of mold growth. You’ll act quickly, but you won’t rush blindly.
Start by identifying the deepest areas, then guide water toward low points for safer extraction. Stay focused and work room by room so your team can keep control.
- Shut off electricity in affected areas.
- Open doors and windows if conditions allow.
- Clear lightweight items from wet floors.
- Keep foot traffic minimal to protect surfaces.
As you remove water, watch for saturated carpet, padding, and baseboards. Quick action helps your home recover faster and keeps your space feeling manageable.
You’re not alone here—steady, methodical steps make a big difference.
Heavy-Duty Pumping Tools
For deeper flooding, you’ll need heavy-duty pumping tools to pull standing water out quickly and safely. You can use submersible pumps, utility pumps, or truck-mounted extractors to move large volumes fast and reduce structural damage.
Place the intake in the deepest area, then route discharge lines outside and away from the foundation. Check for debris, keep cords dry, and monitor flow so the pump doesn’t clog or run dry.
If the water contains sewage, wear protective gear and treat the area as contaminated. Working with the right equipment helps you stay in control and keeps your cleanup team moving together with confidence.
Once the bulk water’s gone, you’re ready for drying, sanitizing, and restoration.
Dry Walls, Floors, and Hidden Cavities
After extraction, technicians dry the exposed walls, flooring, and concealed spaces with targeted air movers, dehumidifiers, and moisture meters to stop remaining water from settling into the structure.
You’ll see them position equipment to push dry air into edges, seams, and cavities, helping your space return to normal faster. Their readings guide every adjustment, so you know the drying plan stays on track.
- They place air movers to keep air circulating.
- They run dehumidifiers to pull moisture from the air.
- They check hidden pockets with moisture meters.
- They adjust placement until readings fall within target levels.
This process helps protect your home and gives you confidence that your cleanup team’s handling the details with care.
Check for Structural Damage and Warping
Once the standing water is gone and the drying equipment has done its job, the next step is to check the structure for damage and warping.
You should inspect drywall, baseboards, subfloors, joists, and framing for bowing, sagging, cracks, or soft spots. Use a straightedge or level to spot uneven surfaces, and press gently to confirm firmness.
If doors stick, trim gaps shift, or floors feel uneven, moisture may have stressed the structure. Mark problem areas and document them with photos so you can track repairs.
You’re not alone in this step; many homes need minor correction after a burst pipe. Catching structural changes now helps you avoid bigger issues later and keeps your space safe, stable, and ready for the next phase of restoration.
Sanitize the Area and Prevent Mold
Now that the damaged areas are dry and structurally stable, you should sanitize every affected surface to reduce bacteria and stop mold before it starts.
Use a cleaner rated for water-damage cleanup, then apply an EPA-registered disinfectant on hard, nonporous materials. Keep good ventilation so the area dries completely, and wear gloves and a mask to protect yourself.
Focus on consistent coverage, especially in corners and seams where moisture can linger.
- Clean visible residue first.
- Disinfect all reachable surfaces.
- Inspect hidden edges for dampness.
- Keep humidity low and monitor daily.
If you’re part of a household handling this together, stay organized and document each step.
That teamwork helps you protect the space and keep mold from gaining a foothold.
Restore Drywall, Flooring, and Plumbing
With the area sanitized and dry, you can move on to rebuilding the damaged structure and systems. Start by removing any drywall that swelled, crumbled, or stayed damp too long. Then install new board, tape the seams, and finish the surface for paint.
Check subflooring and trim; replace warped sections so your rooms feel solid again. For flooring, reinstall salvaged material only if it stayed intact and dry, or choose new matching planks, tile, or carpet pad as needed.
Inspect exposed plumbing for cracked fittings, loose joints, or corrosion, then repair or replace the damaged sections before restoring walls and finishes. Test each connection for leaks and confirm water pressure feels normal.
Step by step, you’re bringing your space back to a safe, comfortable place that feels like home.
When to Call a Water Damage Pro
If the burst pipe caused widespread saturation, soaked insulation, hidden wall cavities, or electrical exposure, call a water damage pro right away.
You can handle minor surface drying, but a pro brings meters, extractors, air movers, and dehumidifiers that stop hidden damage. You’re not overreacting; you’re protecting your home and the people in it.
- Water reaches walls, ceilings, or subfloors.
- You smell musty odors after 24 hours.
- Electrical outlets, panels, or appliances got wet.
- Materials stayed damp after basic cleanup.
A trained team can document losses, dry safely, and reduce mold risk.
That means you can get back to normal faster, with a crew that knows this stress and helps you through it.
Frequently Asked Questions
How Long Does Insurance Usually Take to Cover Burst Pipe Damage?
Usually, you’ll hear back in 1–2 weeks, though full payout can take longer. You can speed things up by filing quickly, documenting damage, and staying in touch with your adjuster throughout the claim.
Can Burst Pipe Water Make Tap Water Unsafe to Drink?
Yes, it can. You should avoid drinking tap water after a burst pipe until you’ve flushed lines and tested safety. Contact your water utility, use bottled water, and follow trusted testing and treatment guidance.
What Items Should Be Discarded After Severe Water Contamination?
You should discard porous items like carpet, mattresses, insulation, drywall, upholstered furniture, paper goods, and contaminated food. You’ll also need to toss any visibly soaked electronics or items that sewage or chemicals have touched.
How Do I Document Damage for an Insurance Claim?
You’ll document damage with dated photos, videos, a written inventory, repair estimates, and receipts. Note affected materials, room locations, and loss dates. Keep copies organized, and submit them quickly to strengthen your claim.
Will My Heating Bill Increase After a Pipe Burst?
Yes—if you keep heating the affected area, your bill can rise. You’ll need steady warmth for drying, but a technician can balance efficiency, limit losses, and help you restore comfort without wasting energy.
Wrap-Up
When you handle a burst pipe quickly, you limit damage and speed up recovery. Shut off the water, cut power if needed, extract standing water, and dry every surface and hidden cavity. Then sanitize the area, inspect for warping or structural issues, and restore damaged materials. If the loss is extensive, call a pro. Acting fast is like stopping a leak at the source—you protect your home before small damage turns into a bigger problem.