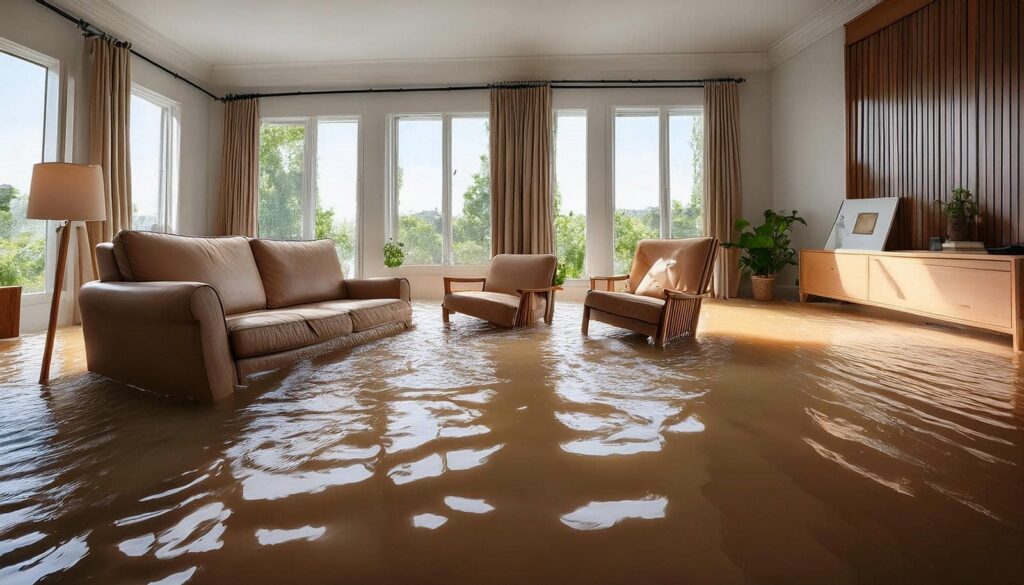
When faced with water damage, you might wonder how long the water damage restoration will really take. The timeline isn’t straightforward; it hinges on various factors like the damage’s extent and the type of water involved. Understanding the key steps in this process is essential. As you navigate through initial assessments and drying phases, you’ll find that each decision can impact the overall duration greatly. What’s the best strategy to minimize your wait?
Key Takeaways
- The duration of water damage restoration varies based on the extent of damage and type of water involved (clean, gray, black).
- Immediate water extraction is crucial; delays can extend overall restoration time significantly.
- The drying phase typically takes 3 to 5 days, depending on environmental conditions and material types.
- Repair and replacement timelines are influenced by the complexity of repairs needed once drying is complete.
- Effective communication with insurance adjusters can expedite the restoration process and minimize delays.
Understanding the Water Damage Restoration Process
When you encounter water damage, understanding the restoration process is essential for effective recovery. It typically begins with a thorough assessment, where professionals identify the extent of the damage.
Next, they’ll extract standing water and thoroughly dry affected areas using specialized equipment. This drying phase is vital, as it prevents mold growth and structural damage.
After drying, restoration experts will repair or replace damaged materials, which might include drywall, flooring, or insulation.
Throughout this process, you’ll want to know how long water damage restoration takes, as timelines can vary based on severity. Typically, a complete restoration can span from a few days to several weeks, depending on the specifics of the damage and the response time involved.
Key Factors Affecting Water Damage Restoration Duration
Several factors influence how long water damage restoration takes, impacting both the timeline and overall effectiveness of the recovery process.
Understanding these factors can help you manage expectations and facilitate a smoother restoration. Here are key considerations:
Extent of Damage: More extensive damage requires more time for effective restoration.
Type of Water: Clean, gray, or black water each presents different challenges and timelines.
Material Affected: Different materials, like wood versus drywall, react differently and may need varied drying times.
Humidity Levels: High humidity can prolong the drying process.
Availability of Resources: Limited access to equipment or personnel can delay restoration efforts.
Initial Assessment: How Damage Is Evaluated
When evaluating water damage, you’ll start with a thorough visual inspection to identify visible signs and affected areas.
Next, you’ll employ moisture detection tools to measure the extent of moisture intrusion hidden within materials.
Finally, determining the severity of the damage helps prioritize restoration efforts efficiently.
Visual Inspection Techniques
Although water damage can manifest in various forms, effective visual inspection techniques are essential for an accurate initial assessment.
When you evaluate the damage, focus on these key areas:
Surface Staining: Look for discoloration on walls and ceilings.
Warping: Check for any bending or swelling in floors and furniture.
Mold Growth: Identify any visible mold, particularly in hidden areas.
Odors: Be aware of musty smells, indicating prolonged moisture exposure.
Structural Integrity: Inspect beams, joists, and other supports for signs of weakening.
Moisture Detection Tools
After conducting a thorough visual inspection, the next step is to utilize moisture detection tools to quantify the extent of the damage.
You’ll typically use a moisture meter, which measures the moisture content in materials like wood and drywall. This tool provides precise readings that help identify hidden moisture pockets.
Infrared cameras are another valuable asset, allowing you to visualize temperature variations that indicate moisture presence behind walls or under floors.
Additionally, hygrometers measure humidity levels in the air, giving you insight into the overall environment’s moisture.
By employing these tools, you can gather critical data that informs your restoration strategy, ensuring you address all affected areas effectively.
Accurate moisture detection is essential for successful water damage restoration.
Damage Severity Assessment
To effectively evaluate the extent of water damage, you must first conduct a thorough damage severity assessment. This assessment helps you identify the critical areas that need immediate attention.
Here’s what you should focus on:
Type of Water: Determine if it’s clean, gray, or black water.
Affected Materials: Check which materials (drywall, insulation, flooring) are damaged.
Extent of Damage: Assess how widespread the damage is throughout the property.
Structural Integrity: Evaluate any potential threats to the building’s structure.
Time Since Damage Occurred: Understand how long the water’s been present to gauge necessary interventions.
How Long Does Drying Take?
The extent of the water damage plays an essential role; more significant damage requires longer drying times. Environmental conditions like temperature and humidity also impact the process.
You’ll likely need to use industrial-grade dehumidifiers and fans to expedite drying. It’s important to monitor moisture levels throughout this period, ensuring that all affected areas reach a safe, dry state.
In some cases, hidden moisture in walls or floors may prolong drying. Keeping a close eye on these elements will help you gauge the drying timeline effectively, ensuring a thorough restoration before moving on to repairs.
Key Steps in Repairing and Restoring Water-Damaged Areas
Restoring water-damaged areas involves a systematic approach to secure thorough repairs. Following these key steps ensures you address the damage effectively:
Assessment: Identify the extent of the damage and affected materials.
Water Extraction: Remove standing water using pumps and vacuums.
Drying: Employ dehumidifiers and fans to eliminate moisture from structures.
Cleaning and Sanitizing: Treat surfaces with antimicrobial solutions to prevent mold growth.
Restoration: Repair or replace damaged materials, such as drywall or flooring.
Navigating Insurance Claims: Impact on Restoration Time
When managing insurance claims after water damage, understanding your coverage limits is essential for a swift restoration process.
You need to document the damage thoroughly to support your claim and expedite communication with adjusters.
Each of these steps directly influences the timeline for your restoration efforts.
Understanding Coverage Limits
What factors determine your coverage limits in a water damage restoration claim? Understanding these elements can streamline your claim process and impact restoration time.
- Policy Type: Standard vs. specialized coverage can affect how much you’re reimbursed.
- Deductibles: Higher deductibles reduce insurer payouts, influencing your out-of-pocket expenses.
- Claim History: Previous claims may lead to higher premiums or lower coverage limits.
- Property Value: Insurers assess your home’s value to set appropriate limits.
- Local Regulations: State laws may dictate minimum coverage requirements, affecting your policy.
Navigating these factors helps you maximize your coverage, ensuring you’re not caught off guard during the restoration process. Knowing your limits allows for better planning and quicker recovery.
Documenting Damage Thoroughly
Start by taking clear photographs of all affected areas, ensuring you capture various angles. Include close-ups of specific damage, such as structural issues or water-soaked materials.
Make detailed notes on each item, describing its condition and any visible deterioration. If possible, gather estimates from restoration professionals to strengthen your claim.
Compiling this information helps establish the extent of the damage and supports your case with your insurance provider.
Ascertain you keep all documentation organized and easily accessible, as this can greatly expedite the claim process and ultimately impact your restoration timeline.
Communicating With Adjusters
Effective communication with insurance adjusters can greatly influence your restoration timeline. To ensure a smoother process, follow these key steps:
Be Proactive: Initiate contact early and keep lines open.
Document Everything: Provide detailed reports, photos, and receipts.
Clarify Coverage: Understand your policy’s specifics and limitations.
Stay Organized: Keep all correspondence, claims numbers, and documents in one place.
Follow Up Regularly: Check in frequently to avoid delays and misunderstandings.
Signs Your Restoration Is Complete: Key Indicators to Look For
Completing water damage restoration involves several vital indicators that signal the process is finished.
First, make sure all affected areas are completely dry; moisture levels should be at or below 15%.
Next, check for any lingering odors, which may indicate hidden moisture or mold. If surfaces feel cool and damp, further drying is necessary.
Inspect for visible signs of mold growth; its absence is essential for confirming completion.
Additionally, verify that repairs—such as drywall replacement and flooring installation—are completed and meet industry standards.
Finally, conduct a thorough inspection with your restoration team to confirm everything aligns with your initial plan.
Frequently Asked Questions
Can I Stay in My Home During Restoration?
You can typically stay in your home during restoration, but it depends on the extent of the damage and the work being done.
If there’s significant structural damage or mold, it’s safer to evacuate. Restoration professionals will assess the situation and advise you accordingly.
Always prioritize safety; if they recommend leaving, it’s for your protection.
Stay informed and communicate with the restoration team to ensure a smooth process while you’re present.
What Types of Water Damage Are Most Common?
Water damage often sneaks in like a thief in the night, leaving chaos in its wake.
The most common types include clean water from burst pipes, gray water from appliances, and black water from sewage backups. Each category requires different handling, as clean water poses less risk than the contaminants found in gray and black water.
Understanding these types helps you navigate the restoration process, ensuring your home regains its safe, welcoming atmosphere.
How Can I Prevent Future Water Damage?
To prevent future water damage, regularly inspect your roof, gutters, and plumbing for leaks or blockages.
Ensure proper drainage around your home by grading the landscape away from the foundation.
Install sump pumps in basements and consider waterproofing measures.
Maintain appliances like washing machines and dishwashers, checking hoses for wear.
Finally, keep an eye on humidity levels indoors to avoid mold growth.
Taking these steps can greatly reduce your risk.
Is DIY Restoration Effective for Minor Water Damage?
Yes, DIY restoration can be effective for minor water damage if you follow a methodical approach.
Start by identifying the source of the water and stopping it. Remove standing water using pumps or mops, then dry the affected area thoroughly.
Use fans and dehumidifiers to prevent mold growth. Inspect for any hidden damage, like behind walls or under floors.
If you’re unsure, consulting a professional is always a good idea for peace of mind.
What Should I Do Immediately After Water Damage Occurs?
When water damage hits, it feels like a tsunami crashing into your home.
First, ensure safety by turning off the electricity and moving to a dry area. Then, stop the source of water, if possible.
Remove valuables and furniture from affected areas.
Begin drying by using fans and dehumidifiers.
Document the damage with photos for insurance.
Finally, contact professionals to assess and repair any structural issues, ensuring your home returns to its former glory.
Review
Understanding the water damage restoration timeline can help you navigate the process more effectively. You might find it surprising that factors like humidity and damage extent can greatly alter your wait. Just when you think you’re nearing the finish line, an unexpected delay can arise. By staying informed and proactive, you can ensure a smoother restoration journey, leading to a quicker return to your home or business. Keep an eye out for those key indicators of completion!